Your instrument is your pride and joy, it is special to you, not to mention they can be very expensive! So, when you need to get take them abroad it’s understandable that you might be worried about travelling with such precious cargo. Particularly if you’ve got a very large or rare instrument that you’re concerned about becoming damaged or lost.
What’s more, over the years you’ve probably heard plenty of horror stories from fellow musicians trying to fly with their instruments and this alone can be enough to put you off. But sometimes it’s unavoidable and you have to travel by air, whether you’re happy about it or not. That’s why we have put together this guide for making sure your instrument is protected and cared for at all stages during your trip.
Read on to find out more about how to do your research, properly prepare and carefully fly with your instrument.
1. Booking your flights
The first big step to getting your instrument abroad is to do your research into airline policies and book your tickets. In this first section, we’ll look at the various steps you need to take to get the ball rolling.
Choose how you want your instrument to fly
It might sound a little odd, but before you do anything you need to decide how you want to transport your instrument. There are several choices, it’s about deciding what works best for you and then looking for an airline that meets your requirements. Your options include checking your bag into the hold like you would your usual luggage, taking it on the plane and putting it in the overhead locker, or buying another seat on the plane specifically for your instrument. We’ll look at these options in more detail later.
Do your research before you book your plane tickets
Before you book your tickets, it’s a good idea to do some research into the different airlines available to you so you can choose the one that is right for you and your instrument. Every airline has different rules and policies when it comes to luggage and in particular instruments, so you’ll need to look into these first. The last thing you want to do is buy a ticket to find out you can’t actually fly with your instrument in the cabin.
As such, it’s best to find an airline that is going to be flexible and that is going to understand your need to protect the instrument. You can do this by looking at their website or getting in touch directly to ask any questions you may have, for example:
- Do I have to check my instrument into the hold?
- Can I take my instrument on the plane with me?
- Will my instrument fit in the overhead locker?
- Will I need to pay extra for my instrument?
It’s a good idea to have your instrument (or instrument case) dimensions with you when you call up the airline, so they are better equipped to answer your questions. Once you’ve found an airline with policies that suit you, it’s time to book your ticket.
Decide whether you need to purchase an extra ticket
As previously mentioned, some airlines may allow you to take your instrument into the cabin with you, but if it won’t fit into the overhead locker, you may need to purchase an extra seat. This is likely to be the case for larger instruments that you don’t want to check into the hold. You should be able to determine whether you need to buy an extra seat or not once you’ve done your research into different airlines. Just be sure you’ve got all your tickets and luggage sorted before you arrive at the airport to avoid any nasty surprises or additional costs.
2. Preparing your instrument
Travelling with your instrument isn’t as simple as throwing it in a bag (and let’s assume you would never do this anyway!). You need to carefully prepare your instrument days before your flight so you know everything is safe and secure. More on how to do this below.
Make sure you prepare your instrument ahead of time
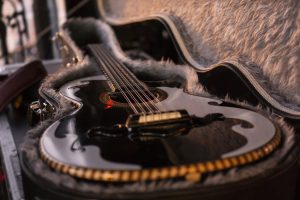
As your flight approaches, you need to make sure you’ve properly prepared your instrument for the flight. This could mean different things depending on whether you’re checking or stowing your instrument, but in any instance, it’s likely that you’ll need a robust case or bag for travelling. This is especially true if you plan to check your bag as it will go through a lot more rigorous steps to get too and from the plane. It can be helpful to put fragile stickers on the case as an extra safety precaution.
If you’ve got any smaller accessories that usually accompany your instrument, it’s a good idea to remove these from the bag or case to avoid any damage that may be caused by these as they move around during the flight. You can pack these accessories in your regular luggage instead if you have enough room.
The next step is to ensure you have no sharp objects or liquids in your instrument case such as cleaning solution. Otherwise, you could have these confiscated and it may take longer for you to get through airport security. Again, you can put these in your regular luggage or check-bag until you arrive at your destination.
If there are any large or loose gaps in your case it’s a good idea to pack these with soft materials, foam or bubble wrap to better protect your instrument. After all, flights can be bumpy and your instrument might get knocked about during the flight. In terms of safety, it’s a good idea to carefully label your case including your name, number and address in case it gets lost. It’s also important to put a lock on your case or bag, especially if your instrument is very expensive.
The final thing you need to consider is changes in temperature on the plane. If you have a wooden instrument you might wish to purchase a device to keep your instrument humidified in a dry plane. If you have a string instrument you need to allow for temperature fluctuations, so loosening your strings can stop these from breaking mid-flight. And last but not least, if you have a brass instrument perhaps include styrofoam cones or blocks to protect it in case of impact. You certainly don’t want a dent in your trombone!
Print the details
If you’re concerned you might face questions or opposition at the airport, it can be helpful to print the airline’s rules for travelling with an instrument from their website or ask for a member of staff to email the rules over to you if you can’t find them online. That way, you have them with you just in case you need to refer to them during your time at the airport or when boarding your flight.
3. Travelling on the day

On the day of your flight, there are several things you need to consider. At this point, you should know whether you’re checking or stowing your instrument and there are things you can do to make sure your journey is as easy and enjoyable as possible.
Make sure you arrive at the airport in plenty of time
It goes without saying that you should arrive at the airport a good few hours before your flight just to be safe, but when you’re travelling with extra baggage like an instrument it is a good idea to leave slightly earlier than usual. This will give you plenty of time to get through security, check your bags as normal and board the plane. You might even wish to buy a speedy boarding pass to get you on the plane early so you can get your instrument on safe and sound without having to squeeze past lots of other passengers. This also gives you a chance to speak to staff and ask any questions you may have.
Check your instrument in if that’s the plan
If you have decided that you wish to check your instrument into the hold, do this as soon as you arrive. That way, you can relax and enjoy your flight without stressing too much about carrying it around the airport.
That being said, accidents do happen occasionally when your bag is being handled, so it’s a good idea to check your instrument as soon as you get it off the carousel at the other end. That way if there is any damage you can report it to airport staff straight away and get a reference number. This will help you later if you need to claim on your insurance.
Be prepared for security checks
If you’re taking your instrument into the cabin, you need to be prepared for it to go through security checks just as you will. Realistically, you might not want others touching your precious instrument but during security checks this may be unavoidable. If it fits, you will be asked to put the case on the scanner, if it’s too big they may take it off to the side to check themselves. Just be aware they may be required to open the case and take a look through the contents, remember this is a necessary measure so keep your cool, do as the airport staff ask and it’ll be done in just a few minutes.
Keep your instrument in your sights at all times
As you travel through the airport, you might want to do a bit of shopping or sit somewhere for food and drink. Just be careful that you have your instrument in your sites at all times. The usual airport rules apply, never leave it unattended even for a second! If it’s a bit of a hassle to carry then it’s better to check your instrument or perhaps buy a travelling bag with straps so you can carry it on your back.
4. Use a luggage shipping service instead

Sometimes the best way to take your instrument overseas with you is not to take it on the plane at all. It’s worth noting that there are other alternatives if you’re worried about taking such a valuable belonging on a plane. Using a luggage shipping service could make your life much easier and that’s where My Baggage comes in! Our couriers will collect your instrument (or any luggage for that matter) from your chosen location and drop it off to the door at your final destination. This means you could have us collect your instrument from your home, you can then travel to your destination and once there await the delivery of your bags. Easy!
This can save you a lot of hassle in the long run and better still it works out cheaper than the excess baggage fees you will encounter at the airport. You can track your instrument every step of the way so you can then travel light safe in the knowledge that we are dedicated to getting your items to you safe and sound.